Host-Agnostic Deploys with Nanobox
Nanobox provides an entire end-to-end workflow for developing and deploying applications. Using Nanobox to deploy also means you’ll use it to develop your application.
What You’ll Need
With Nanobox you don’t need to worry about having Go or Hugo installed. They’ll be installed as part of the development environment created for you.
To get started you’ll just need the following three items:
- A Nanobox Account - Signup is free
- Nanobox Desktop - The free desktop development tool
- An account with a hosting provider such as:
Before You Begin
There are a few things to get out of the way before diving into the guide. To deploy, you’ll need to make sure you have connected a host account to your Nanobox account, and launched a new application.
Connect a Host Account
Nanobox lets you choose where to host your application (AWS, DigitalOcean, Google, Azure, etc.). In the Hosting Accounts section of your Nanobox dashboard link your Nanobox account with your host.
Launch a New Application on Nanobox
Launching a new app on Nanobox is very simple. Navigate to Launch New App in the dashboard, and follow the steps there. You’ll be asked to name your app, and to select a host and region.
With those out of the way you’re ready to get started!
Getting Started
To get started, all you’ll need is an empty project directory. Create a directory wherever you want your application to live and cd into it:
mkdir path/to/project && cd path/to/project
Configure Hugo to run with Nanobox
Nanobox uses a simple config file known as a boxfile.yml to describe your application’s infrastructure. In the root of your project add the following boxfile.yml:
run.config:

  # use the static engine
  engine: static
  engine.config:

    # tell the engine where to serve static assets from
    rel_dir: public

  # enable file watching for live reload
  fs_watch: true

  # install hugo
  extra_steps:
    - bash ./install.sh

deploy.config:

  # generate site on deploy
  extra_steps:
    - hugo
Installing Hugo
Nanobox uses Docker to create instant, isolated, development environments. Because of this, you’ll need to make sure that during development you have Hugo available.
Do this by adding a custom install script at the root of your project that will install Hugo automatically for you:
#!/bin/bash

if [[ ! -f /data/bin/hugo ]]; then
  cd /tmp
  wget https://github.com/gohugoio/hugo/releases/download/v0.31.1/hugo_0.31.1_Linux-64bit.tar.gz
  tar -xzf hugo_0.31.1_Linux-64bit.tar.gz
  mv hugo /data/bin/hugo
  cd -
  rm -rf /tmp/*
fi
Generating a New Hugo App
You’ll generate your new application from inside the Nanobox VM (this is why you don’t need to worry about having Go or Hugo installed).
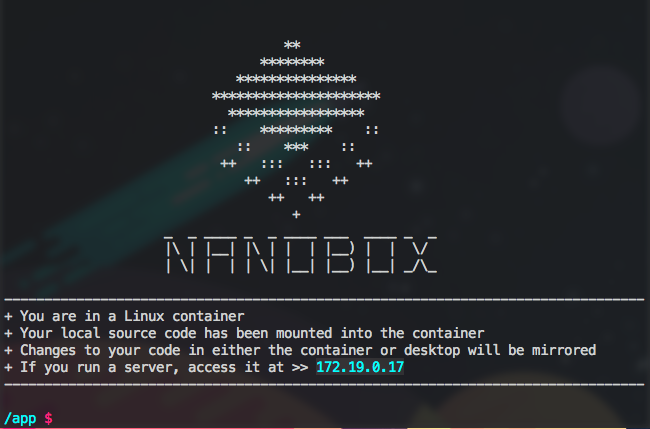
Run the following command to drop into a Nanobox console (inside the VM) where your codebase is mounted:
nanobox run
Once inside the console use the following steps to create a new Hugo application:
# cd into the /tmp dir to create an app
cd /tmp

# generate the hugo app
hugo new site app

# cd back into the /app dir
cd -

# copy the generated app into the project
shopt -s dotglob
cp -a /tmp/app/* .
Install a theme
cd into the themes directory and clone the nanobox-hugo-theme repo:
cd themes
git clone https://github.com/sdomino/nanobox-hugo-theme
To use the theme either copy the entire config.toml that comes with the theme, or just add the theme to your existing config.toml
# copy the config.toml that comes with the theme
cp ./themes/nanobox-hugo-theme/config.toml config.toml

# or, add it to your existing config.toml
theme = "nanobox-hugo-theme"
View Your App
To view your application simply run the following command from a Nanobox console:
hugo server --bind="0.0.0.0" --baseUrl=$APP_IP
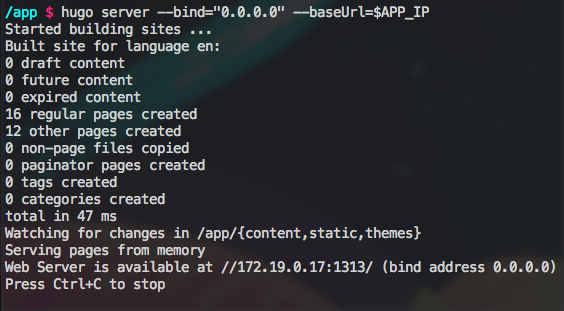
With that you should be able to visit your app at the given IP:1313 address
Develop, Develop, Develop
With Hugo installed you’re ready to go. Develop Hugo like you would normally (using all the generators, etc.). Once your app is ready to deploy, run hugo to generate your static assets and get ready to deploy!
Deploying Hugo with Nanobox
To deploy your application to Nanobox you simply need to link your local codebase to an application you’ve created on Nanobox. That is done with the following command:
nanobox remote add <your-app-name>
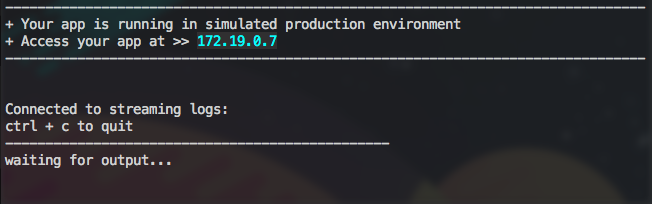
Stage Your Application (optional)
Nanobox gives you the ability to simulate your production environment locally. While staging is optional it’s always recommended, so there’s no reason not to!
To stage your app simply run:
nanobox deploy dry-run
Now visit your application with the IP address provided.
Deploy Your Application
Once everything checks out and you’re ready to deploy, simply run:
nanobox deploy
Within minutes you’re Hugo app will be deployed to your host and humming along smoothly. That’s it!